 Heads
Heads Bodies
 Custom Doll Sets
 Eyes
Eyes Wigs & Wefts
 Clothes
 Shoes
Shoes Display/Stands
 Toy Skeletons
 Kewpie Dolls
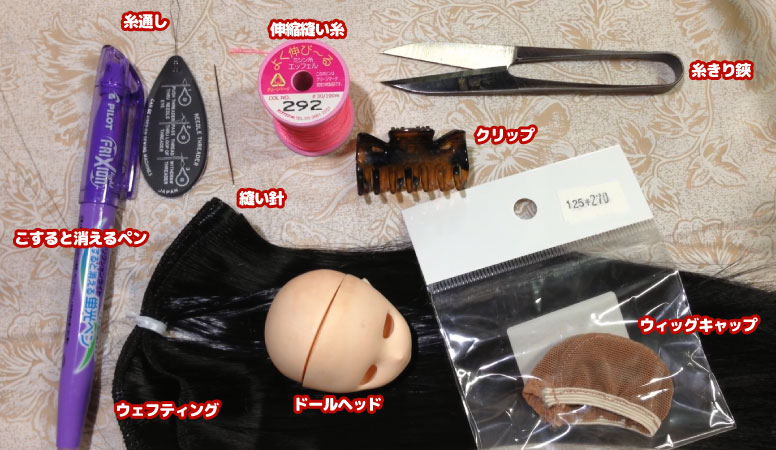
This tutorial shows how to make a 1/6 scale wig using a heat-resistant weft and a wig cap. What we used in this tutorial | |
|
Tutorial video |
|
|
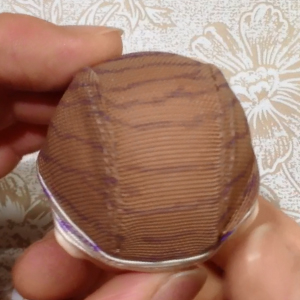
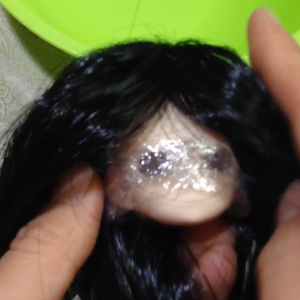
(1) Applying a wig cap to the head |
|
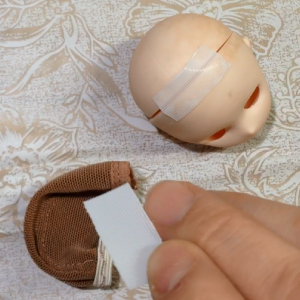 1. Applying the wig cap to the head using mechanical fastners. We used only the hook side of the velcro attached to the head to hold the wig into place. (no need to use the soft side.) |
 2.Reverse the wig cap and make it touch the crown of the head then reverse it back over the head. |
|
(2) Drawing a guide line for wefting. |
|
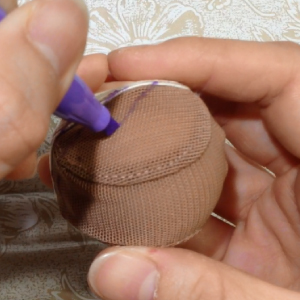 1. Using the pen we drew a line for sewing the weft.The line goes around from bottom (wig line) to top (head crown). |
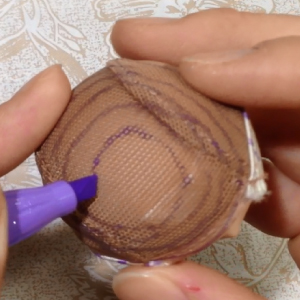 2. The lower part has straight lines and the upper part of head has spiral line. |
 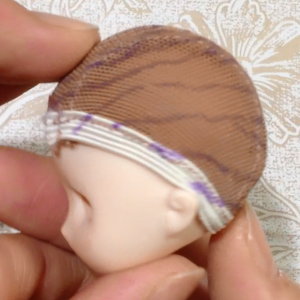 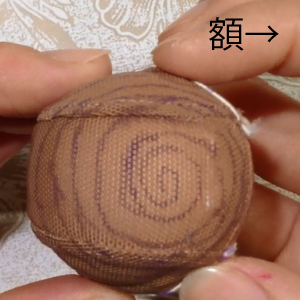
The lines would look like these pictures. The pictures were taken from the back of the head, the side of the head, and the top of the head. |
|
|
(3) Sewing weft along the guide line. |
|
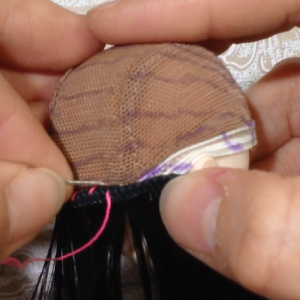 1. Start with the bottom line. We used the pink thread to make it easy to see, but use the similar color thret to the weft color. When you finish the whole line, cut the weft and work on the second line. |
 2. Once you get to the shirl line, sew along it without cutting it. Leave the crown part not to sew. |
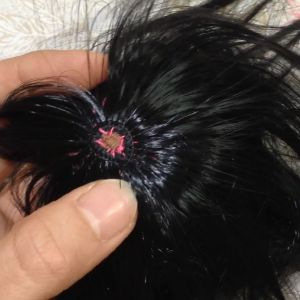 3.We left this much for the crown. |
|
|
(4) Working on the crown |
|
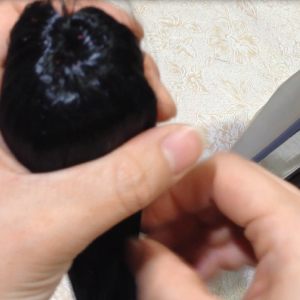
 1. Cut the crown part and make an opening. |
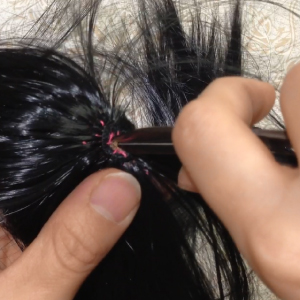
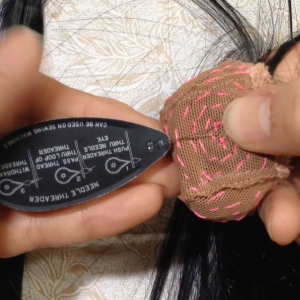 2. Flip the wig cap inside out and stick the treading from inside. |
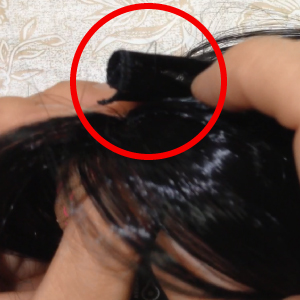
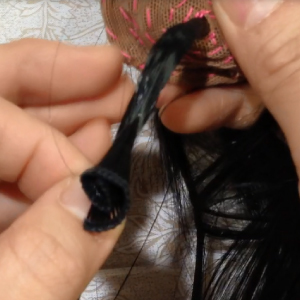
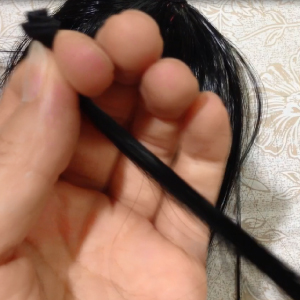 3. Cut the weft of hair for crown. We cut 5cm of the weft for the 5 inch wig. Roll the weft to make a bunch of hair. |
 4. Flip the wig cap back and put the weft into the threading opening. |
 5. Pull the threading down to pull the hair to the back. |
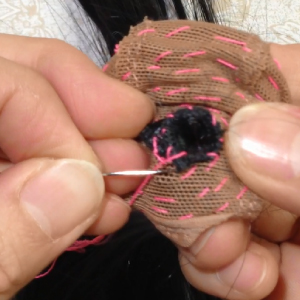 6.Open up the weft and sew it inside of the wig cap. |
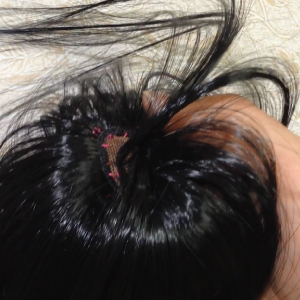
7.Flip the wig cap back again. |
|
|
(5) Adusting the crown hair |
|
 1. Since we use a heat-resistant type weft, we can use an iron with it. |
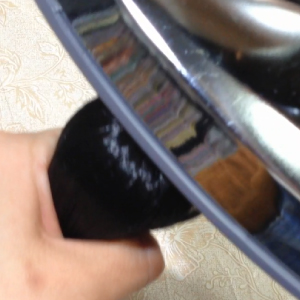 2. Put the iron on the top of the head gently. |
|
If you have non-heat resistant weft, you are not able to use iron for it, so skip this. |
|
|
(6) Shaping the hair natural |
|
 1. Using hot water to shape the hair and make hair straight natually. |
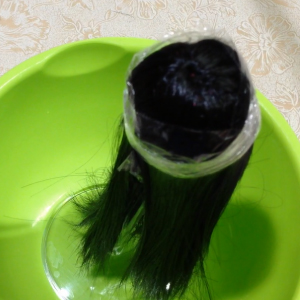 2. Wrap plastic wrap around the head a couple of times to fix the wig in the position. Use a long stick hold the head and pour hot water over the top of the head. |
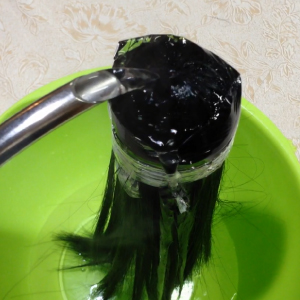 3. Let the hair dry completely. |
|
|
(7) Making bangs |
|
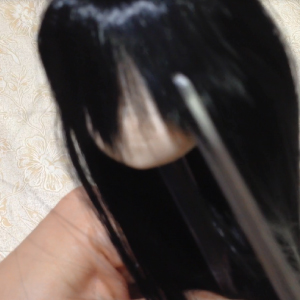 1. Cut bang to longer than desired length. |
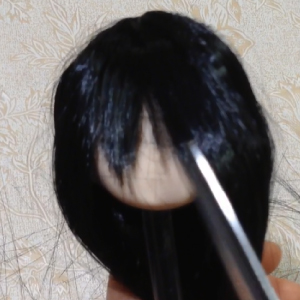 2.Cut the bang little by little lengthwise until your favorite length. |
|
Complete! 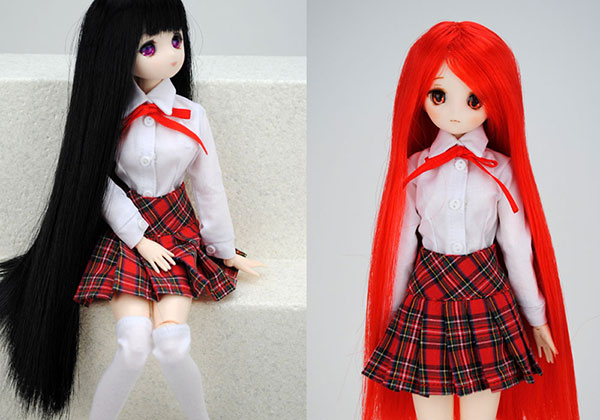 This wig is versatile long straight in style. |
|