 Heads
Heads Bodies
 Custom Doll Sets
 Eyes
Eyes Wigs & Wefts
 Clothes
 Shoes
Shoes Display/Stands
 Toy Skeletons
 Kewpie Dolls
 How to make a 1/3 scale no bang hair style wig
This is a tutorial that shows you how to create a long straight wig using pink weft and wig caps. Using this basic method, you can create the hair style you like.
In this tutorial, we use heat-resistant type long weft straight (length: 50cm) pink color and heat-resistant type weft straight (length: 25cm) pink color. The wig cap is the 8 inch size which is good for the Parabox Gretel head. We use two wig caps.
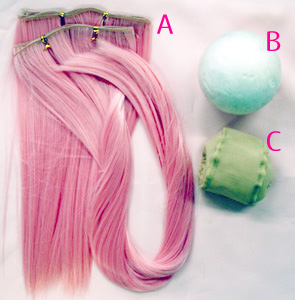 |
What we used in this tutorial A・Heat-reistant weft B・Styrofoam ball C・Two wig caps | |
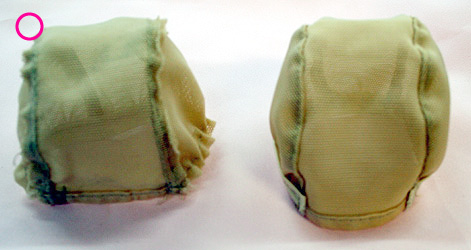 |
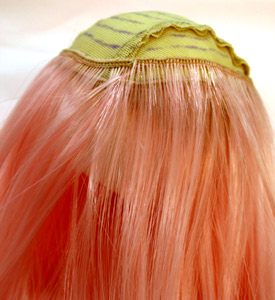
【Wig cap preparation 】 (Left) inside out (right) normal We will sew weft on the wig cap inside out which is like the left version in the picture. | |
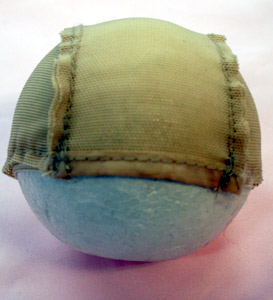 |
(1) Put an inside out wig cap on a styrofoam ball A Styrofoam ball is very helpful for this project. You could use an appropriate size clay boll. | |
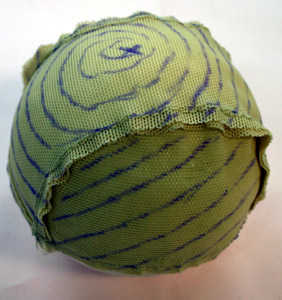 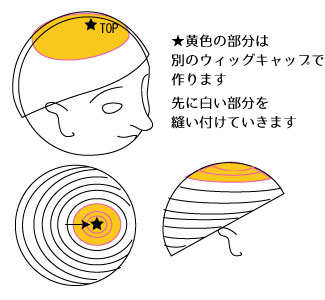 |
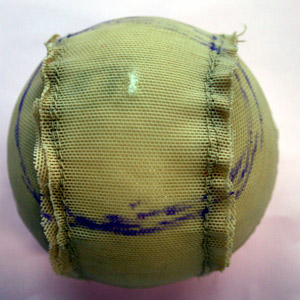
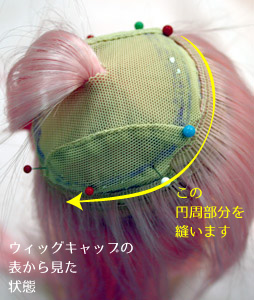
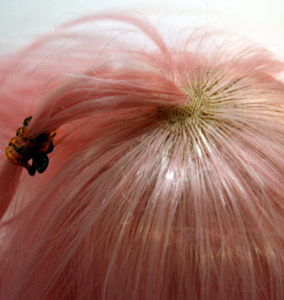
(2) Drawing a guide line for wefting Mark the top of the wig and make concentric circles that will be used for sewing the heft Where there is more space between lines, there will be more hair implanted and then where there is less space between lines, there will be less hair implanted. The center point of the wig is closer to the forehead than the absolute crown of the head. We will use the short weft for the yellow area and the long heft for the white part. | |
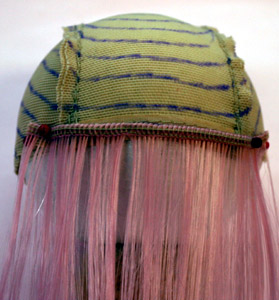 |
(3) Sewing weft along the guide line. Start sewing the edge with the longer weft. The picture shows the front part where weft has been sown to cover the face. | |
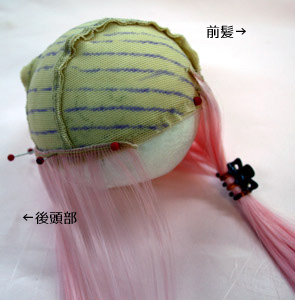 |
Sewing weft up along the mark from the bottom line. In the picture, the left part of the head is back and the right side of the head is front. | |
 |
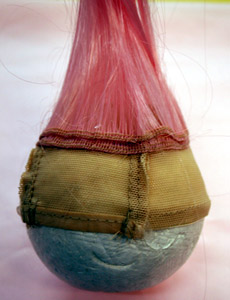
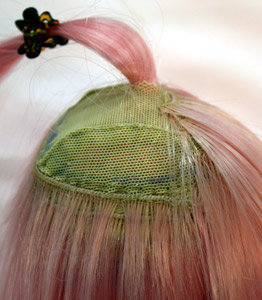
Finished sewing two thirds of the wig in the picture. |
|
 |
(4)Making the top of the wig using the other wig cap Put the other wig cap on the Styrofoam ball inside out and open up a hole on the center point. Mark the line one third from the top. (The line should be located on the same side as with the next line of the other wig.) | |
 |
(5)Sew the shorter weft along the line Sew the 25cm weft twice along the line you just drew. | |
 |
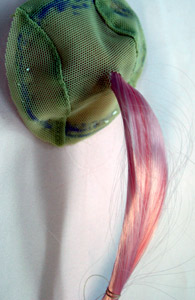
(6)Moving the sewed weft to the other side through the whole Flip the wig cap inside out while putting hair through the hole to the other side and then flip the wig cap back like in the right picture. Tie the hehair with a rubber band or hair clip. (left picture)The hair is the other side through the whole. And you will filp the the wig cap back to make it look like picture in the right. (right picture) Does your look like this? | |
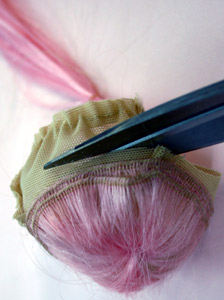  |
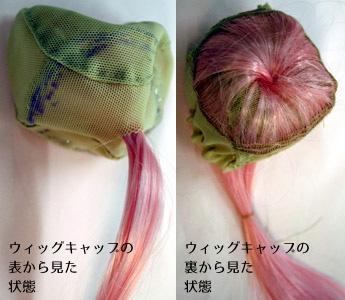
(7)Cut off the area that are not sewed. (left)Cutting off the unneeded part of the wig cap. (right)It will look like this when you flip the wig cap over. | |
 |
(8)The two layers were sew in the left picture. Put the first wig cap on the ball again. And attach the other wig cap on the top of the wig cap with needles tentatively. | |
 |
(9)Sewing the weft on the upper head Start sewing the 25cm weft along the close to the edge of the cut wig cap. Keep the same distance as the previous row and sew until close to the top. | |
 |
Finish sewing up to the top of the head | |
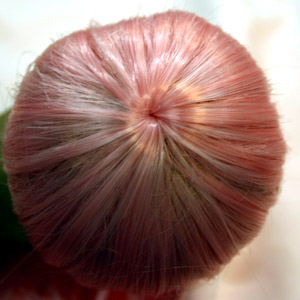 |
(10)Finishing up the top of the head Spread the hair equally and make a beautiful hair whorl. | |
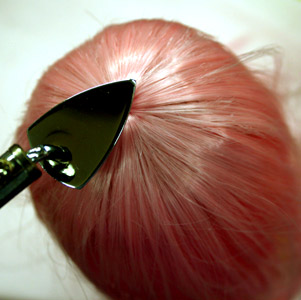 |
(11)Shaping up the top Push down the top using your hair iron (if the hair is heat-resistant, set up to 150 CC degrees for hair-resistant hair and up to 80 C degrees for toyokaron.) | |
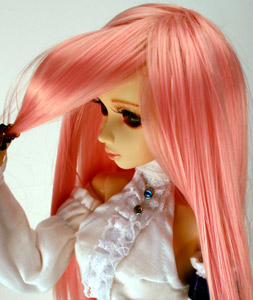  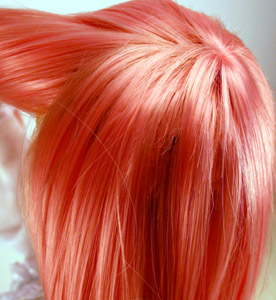
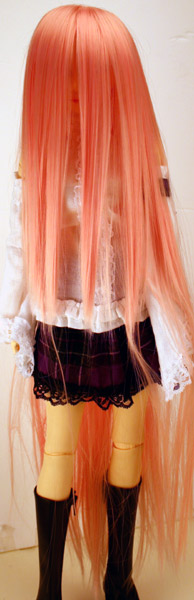
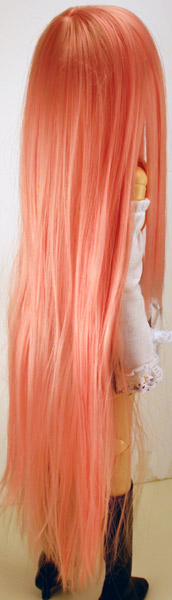
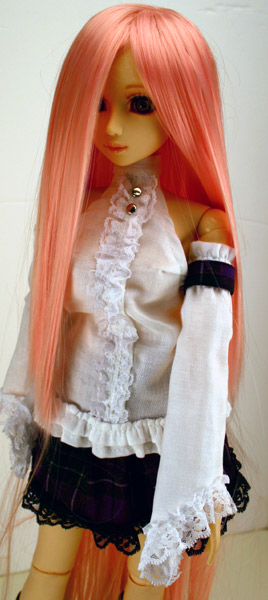
Done! Hair looks natural from any angles. Arrange your favorite style. | ||
| ||
Warning - Parabox is not responsible for injuries that might result from following this tutorial. | ||